A bad answer to a simple question, and you probably blame your speaker when you should blame the math. You’re processing a phone recording of an interview, the dialog sits at -22 LUFS and the office AC hum sits at -38 LUFS, and each time you pull the fader down 6 dB to even things out, the peaks start clipping anyway. Yet the recording was clean. The cause is the math: percentage and dB are not the same arithmetic, and most volume sliders conflate the two. Build the right intuition today. The question is whether you ship audio that broadcasts clean, or keep nudging the slider until the next job fails.
The right tool for the job. The Audio Volume Decrease tool on Elysia Tools takes the ambiguity out of the calculation. You feed it a percentage (a multiplier from 0 to 100) or a dB value (a logarithmic scale where every -6 dB halves the amplitude), and it converts your input to the same underlying gain factor before applying it. Drop in any audio file, pick your unit, and you get back a clean output with predictable peaks. It is a thin wrapper around the same DSP math a podcast editor runs under the hood, but without the trial-and-error cycle of dragging faders while watching the meter bounce.
Why your “lower the volume” button keeps clipping
Most recording apps ship with a volume slider that is linear in raw sample value, not in loudness. If your input peaks at -3 dBFS and you drag the slider to 70%, you are multiplying samples by 0.7, which is the same as applying -3.1 dB of attenuation. The output now peaks around -6 dBFS, which is fine — but if your input already peaks at 0 dBFS (the maximum representable digital value), the clipping happened at the recording stage, not at your fader. Lowering gain after clipping does not undo clipping. It only makes the crunchy bits quieter.
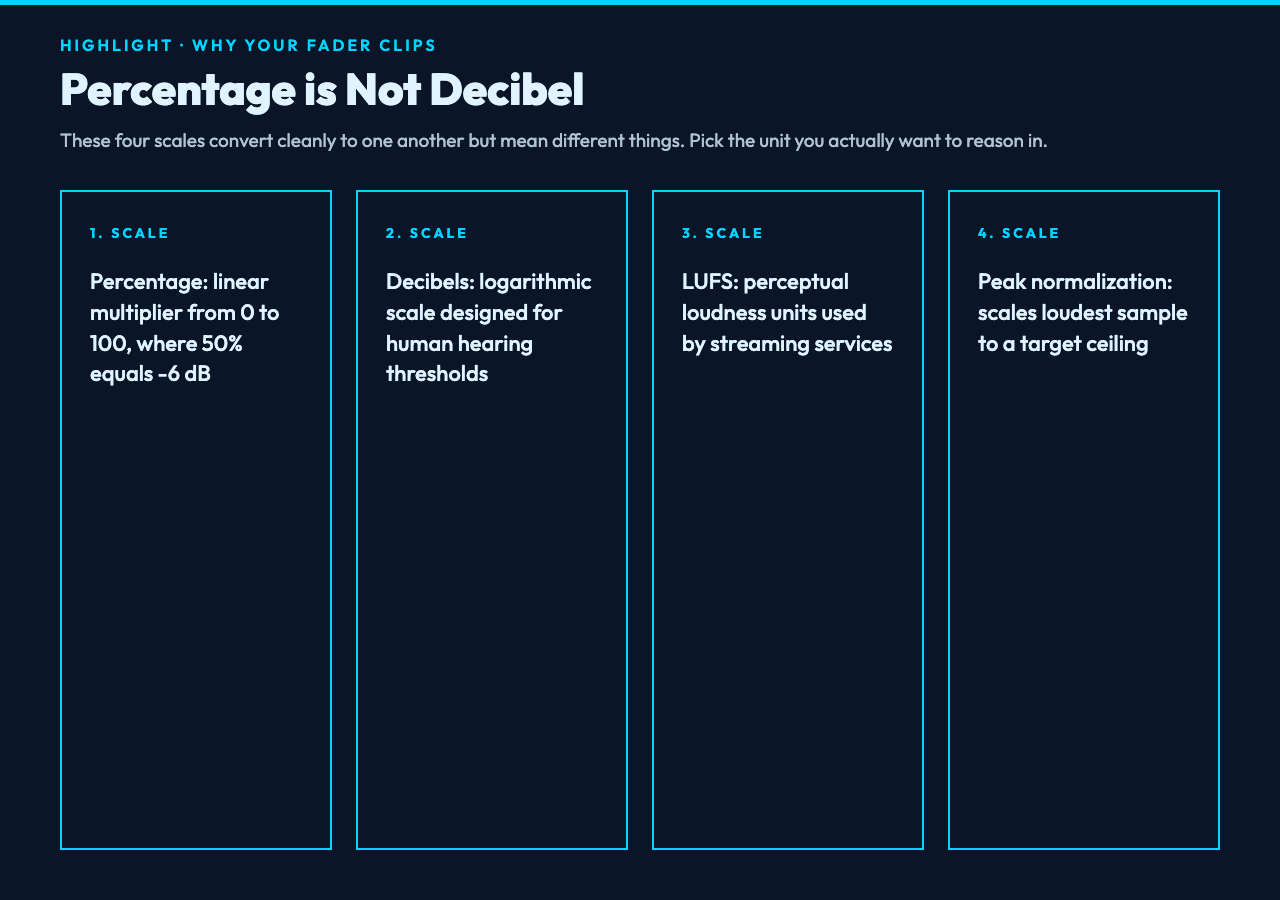
There are four common ways to attenuate an audio clip, and they are not interchangeable. The right unit depends on what you are measuring:
- Percentage — A linear multiplier where 100% means unchanged, 50% means half amplitude (which is -6 dB), 10% means one-tenth amplitude (which is -20 dB). Conceptually simple, but the math is misleading: a “small” 80% reduction is actually -1.9 dB, almost inaudible on broadcast material.
- Decibels (dB) — A logarithmic scale designed for human hearing. -6 dB halves the perceived loudness, -20 dB makes it ten times quieter. Each audio engineer thinks in dB; each casual app thinks in percentage.
- Loudness units (LUFS) — A perceptual loudness scale that bakes in how the human ear weights different frequencies. Used by each streaming service for normalization.
- Peak normalization — Find the loudest sample, scale the rest so the loudest sample hits a target level. Sounds great in theory, breaks spectacularly on speech with breathy passages.
These scales interconvert cleanly. -6.02 dB is exactly the attenuation you get from 50% (a factor of 0.5). -20 dB is exactly the attenuation from 10% (a factor of 0.1). The Audio Volume Decrease tool handles the conversion for you, so you only have to pick the unit you actually want to think in.
A working workflow for podcast dialog cleanup
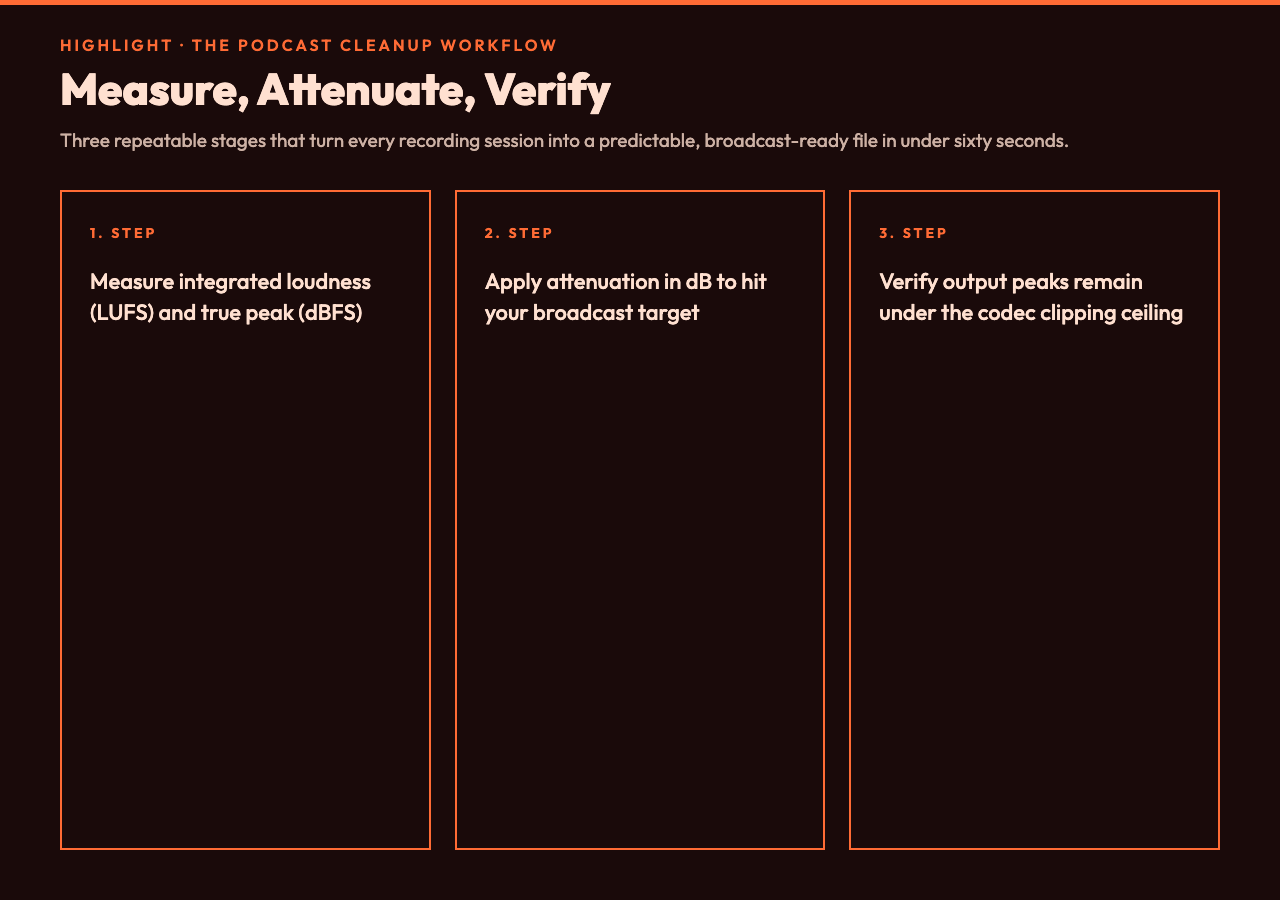
The naive approach — pull the fader down until the meter peaks at -1 dBFS and call it done — produces podcasts that sound quiet on phone speakers and get re-normalized by Spotify anyway. The pro workflow has three stages: measure, attenuate, verify.
Stage 1 — measure the loudness range. Open your file in any analyzer that reports LUFS (most DAWs and even Audacity with the right plugin will do this). You are looking for two numbers: the integrated loudness (the average across the whole file, in LUFS) and the true peak (the highest momentary value, in dBFS). For spoken word targeting the -16 LUFS standard of Apple Podcasts, anything above -18 LUFS needs to come down; anything above -1 dBFS true peak will clip on conversion to lossy formats.
Stage 2 — apply attenuation in dB. Once you know how far you need to come down, you can convert LUFS to dBFS attenuation only if you also know the integrated loudness you want. For a -22 LUFS interview to hit -16 LUFS, you need -22 – (-16) = -6 dB. Open the Audio Volume Decrease tool at Elysia Tools, dial in -6 dB, drop your file, and download the result.
Stage 3 — verify the new peaks. Re-measure with the same LUFS analyzer. Integrated loudness should now sit at -16 LUFS plus or minus 0.5. True peak should sit at least 1 dB below your clipping ceiling (typically -1 dBFS for lossy codecs, -2 dBFS for AAC). If either is off, run the file through again with a smaller dB value.
The whole pipeline runs in under a minute for a 30-minute interview. The bottleneck is your analyzer, not the math.
Common mistakes that survive every loudness meter
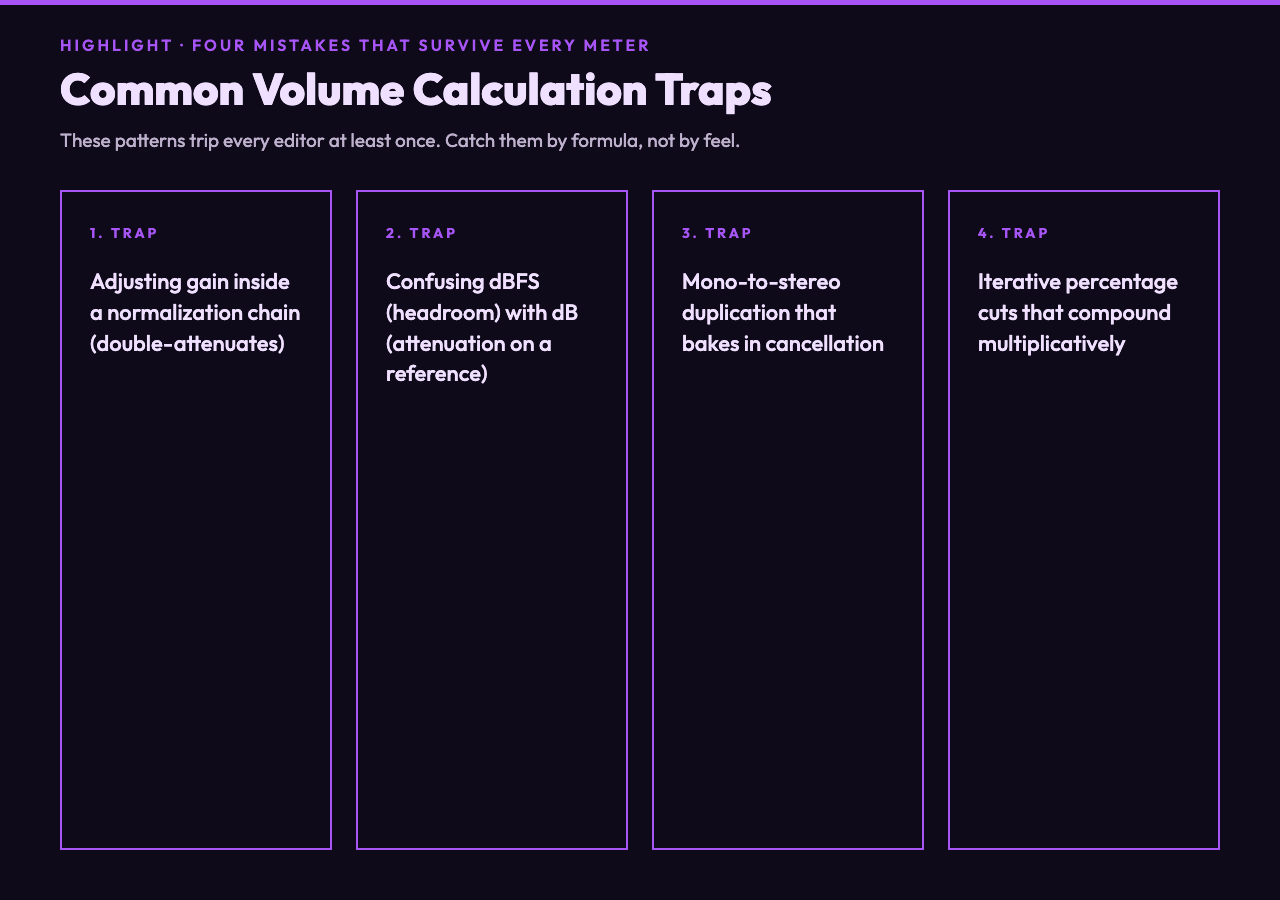
Even with a working pipeline, four traps catch most editors:
- Applying gain inside a normalized playback chain. If your editor normalizes to -14 LUFS for streaming but you also pull the volume down -6 dB, you double-attenuate and the file ends up at -20 LUFS on playback. Always check the chain order. Gain adjustment first, loudness normalization last.
- Confusing dBFS with dB. dBFS measures a digital signal’s headroom below full scale; dB measures attenuation or amplification on top of any reference. -6 dBFS means the signal is six dB below the maximum digital value. -6 dB applied to a signal means you cut its amplitude by a factor of two. They are different scales that happen to share a unit symbol.
- Forgetting mono vs stereo matching. A stereo file attenuated by -6 dB stays a stereo file. A mono file converted to stereo and then attenuated sounds identical but bakes in the duplication. Pick one channel configuration and stick to it.
- Trusting the percentage slider alone. 50% is -6 dB, but 50% of a 50%-already-reduced file is 25%, not 50%. If you are applying changes iteratively, switch to dB and reason in additive (-3 dB + -3 dB = -6 dB) rather than multiplicative percentages.
The Audio Volume Decrease tool handles all four correctly because it operates on the raw sample values directly, after the percentage-to-dB conversion. You never have to think about them.
Where percentage still makes sense
There are exactly three situations where percentage beats dB:
- Silence-by-zero cases. Attenuating by 100% means multiplying amplitude by zero. The cleanest way to silence a clip without introducing DC offset. dB has no clean zero — going below -100 dB gets you into the noise floor.
- Trivial fades. A 30% volume reduction during a pause is easier to type than “-5.2 dB”. When the value is approximate, percentage is faster to dial in.
- Bayesian eyeballing of a UI. When you do not know the loudness yet and want to “try a small reduction”, a slider that goes from 100% down feels more intuitive than one that starts at -infinity.
For everything else, dB is the correct unit. The trick is that most consumer apps expose percentage-only because it is easier to render as a slider. Professional tools expose dB because the math is correct.
Putting it together in one script
If you are processing a batch of recordings, here is the order of operations that holds up across formats and loudness targets:
1. Measure the integrated loudness and true peak of the input.
2. Compute the required attenuation in dB as (target LUFS – measured LUFS), then clamp to a safe range of -3 dB to -12 dB.
3. Apply that dB attenuation via a tool that does the math correctly. The Audio Volume Decrease tool at Elysia Tools accepts the input directly and returns the output as a clean download.
4. Re-measure the integrated loudness to confirm the target was hit.
5. Verify the true peak sits below the codec ceiling.
6. Encode to the final delivery format (MP3, AAC, Opus), applying codec-specific headroom adjustments.
For test material, the AAC audio samples on Elysia Tools give you a clean -23 LUFS reference track. Drop it through the same workflow and confirm you land at your target LUFS; if you do not, your math is off before your recording was.
If you build this into your pipeline once, every subsequent recording is a five-second operation. The question is whether you do it now, while the math still feels like a chore, or after the next time a loud clip blows a listener’s eardrums. The next time is coming. Build the workflow today.