Why a Convex Lens Can Show You What’s Not Really There
Move an object close to a convex lens and something strange happens: the image flips, grows larger, and appears to float in space — even though nothing is actually there. Move the object further away and the image shrinks, inverts, and finally vanishes. The lens is not lying to you. It is doing precise geometry with light.
This is the physics of convex lens imaging — and once you see how it works, you’ll notice it everywhere. From the glasses on your face to the camera in your phone, from a microscope peering into a cell to a telescope reaching for stars, convex lenses are the optical workhorses of every instrument that needs to magnify or focus light.
The Lens Formula That Predicts the Unseen
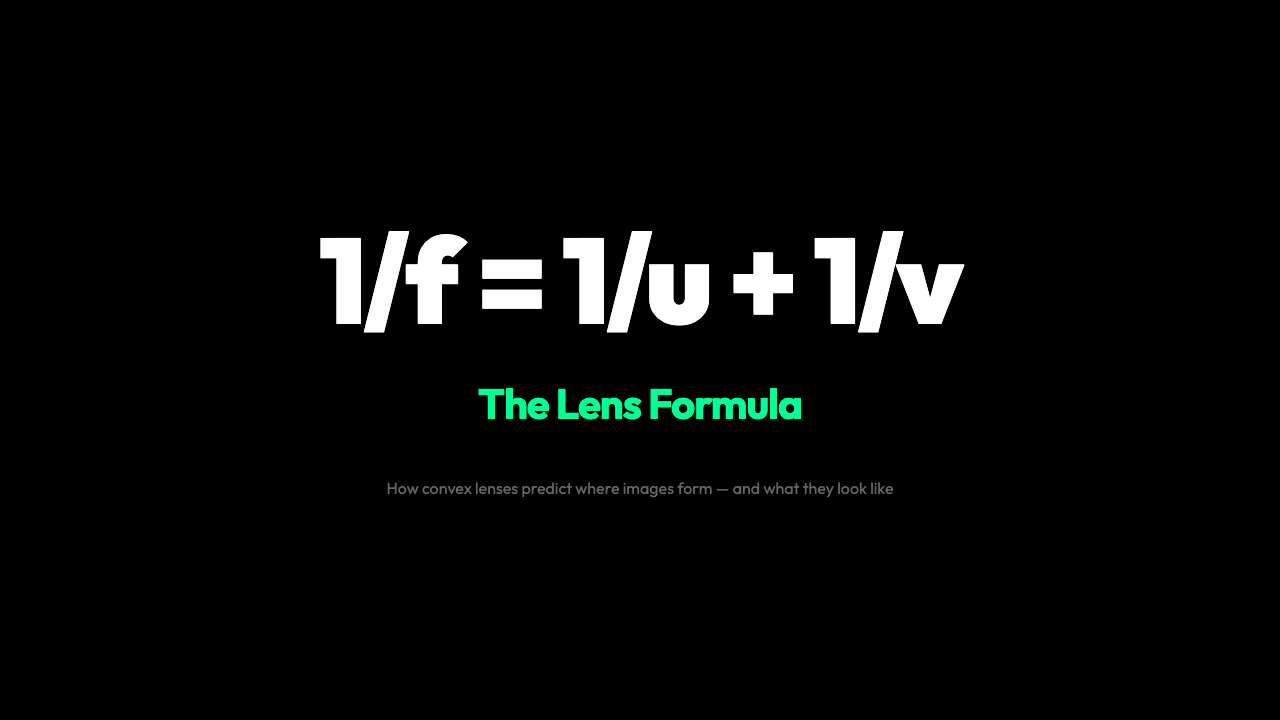
Every convex lens obeys one equation that governs every image it can produce:
1/f = 1/u + 1/v
Where: – f is the focal length — the distance from the lens at which parallel rays converge – u is the object distance — how far the object sits from the lens – v is the image distance — where the image forms on the other side
This three-way relationship is exact. Given any two values, the third is determined. If you know your object is 300 mm from a lens with a 100 mm focal length, the image will form at exactly 150 mm on the other side. No ambiguity, no approximation — pure algebraic consequence of how spherical surfaces refract light.
From the same three numbers comes the magnification:
M = hᵢ/hₒ = −v/u
The negative sign tells you something immediately: when v is positive (a real image forms on the opposite side from the object), the magnification is negative, which means the image is inverted. A positive magnification means the image is upright — but that only happens when v is negative, which signals a virtual image, formed on the same side as the object, that your eye sees by tracing rays backward.
Real vs. Virtual: Two Ways to Be “Seen”
Not all lens images are created equal. The physics distinguishes sharply between two types.

A real image forms when rays of light actually converge at a point. You can project it onto a screen — the image literally exists in space on the far side of the lens. A projector throws a real image onto a wall. Your eye focuses a real image onto your retina. Real images are always inverted (top and bottom swapped) and form on the opposite side of the lens from the object.
A virtual image is a trick of geometry. The rays never actually meet — they only appear to diverge from a point behind the lens. You cannot project a virtual image onto a screen. You can only see it by looking through the lens, with your eye and brain reconstructing the apparent source. Virtual images from convex lenses are always upright and magnified.
The boundary between these two regimes is exactly at u = 2f — when the object sits at twice the focal length. This is where the lens flips its behavior:
| Object Position | Image Type | Image Size | Orientation |
|---|---|---|---|
| u < f (within focal length) | Virtual | Magnified | Upright |
| u = f (at focal length) | Image at infinity | Infinitely large | — |
| f < u < 2f (between f and 2f) | Real | Magnified | Inverted |
| u = 2f | Real | Same size as object | Inverted |
| u > 2f (beyond 2f) | Real | Reduced | Inverted |
That last row — u > 2f — is why a convex lens can shrink the world. Hold a magnifying glass at arm’s length and look at a distant street sign: the lens forms a small, inverted, real image of the sign on your retina. Your brain interprets it as a coherent scene even though every point of light has been flipped.
Principal Rays: How to Draw What the Lens Sees
The lens formula tells you where the image forms. To see what it looks like, you need only two rules of ray geometry — so reliable they are called the principal rays.

Principal Ray 1 runs from the top of the object parallel to the optical axis, hits the lens, and refracts through the far focal point. Every parallel incoming ray does this; it’s the definition of focal length.
Principal Ray 2 runs from the top of the object through the center of the lens. Light passing through the exact center of a thin lens is undeflected — it continues in a straight line.
Where these two rays intersect on the far side is where the top of the image sits. The bottom of the image sits on the optical axis directly below.
This is not approximate or artistic. Every convex lens in every physics textbook uses exactly this construction because the geometry is exact for paraxial rays — rays that stay close enough to the optical axis that the small-angle approximation holds.
The Magnifying Glass in Your Hand
The most familiar use of a convex lens is the simple magnifying glass, held close to an object at u < f. In this configuration, the lens produces a virtual, upright, magnified image — the kind you can read by looking through the glass.
This is why reading glasses for farsighted people use convex lenses. The lens adds focusing power to an eye whose focal point would otherwise fall behind the retina. The extra convergence brings close objects into sharp focus.
A convex lens used this way — as an aid to vision — is doing exactly the same physics as when it is used as the eyepiece of a telescope or the objective of a microscope. The difference is only in scale and arrangement.
The Telescope and the Microscope: Two Lenses Talking
The compound microscope stacks two convex lenses. The objective lens (near the object) forms a real, magnified image at a distance. The eyepiece lens (near the eye) then takes that real image as its object, and — if the intermediate image sits within the eyepiece’s focal length — produces a virtual, further-magnified image that fills your retina.
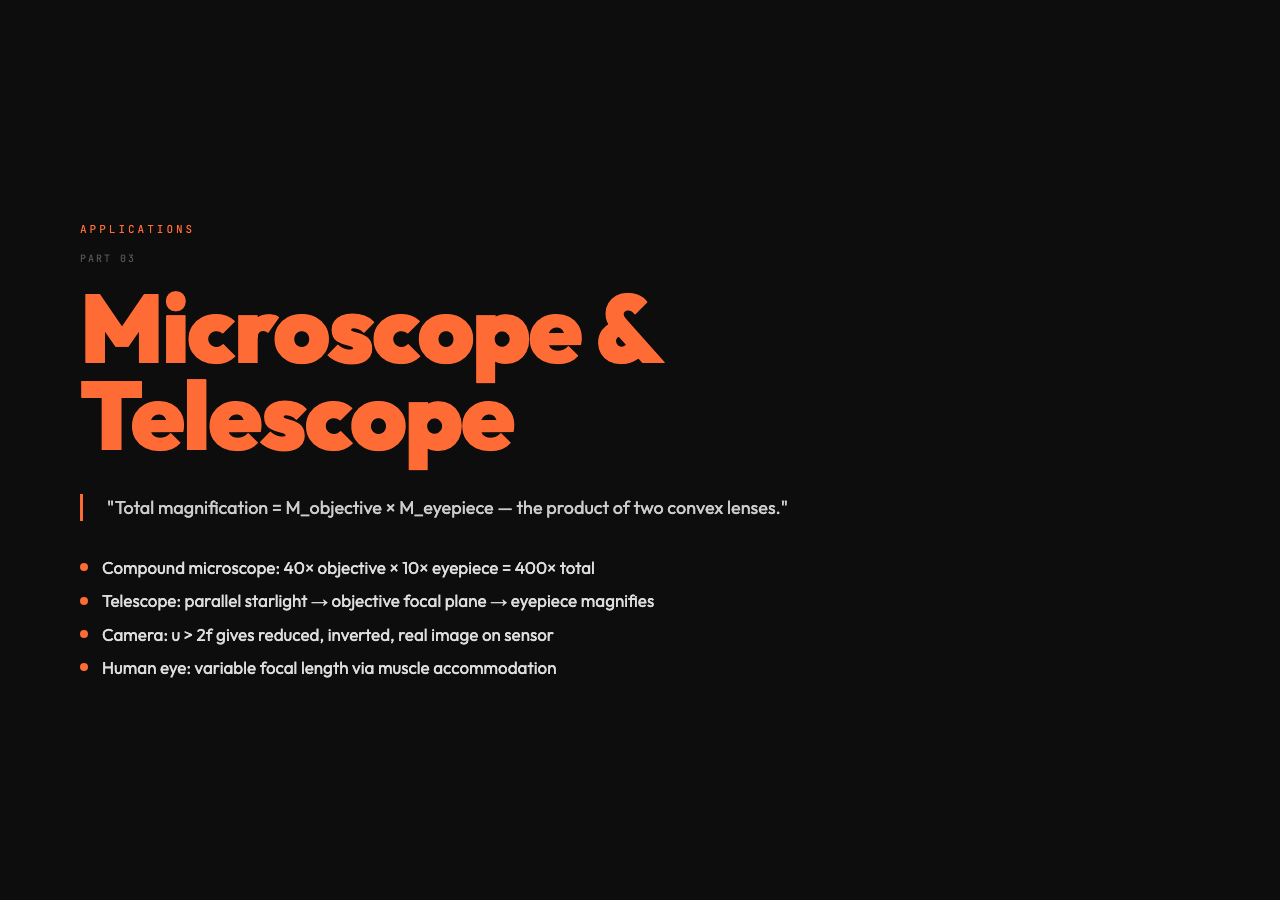
Total magnification is the product of both lenses: M_total = M_objective × M_eyepiece. A 40× objective with a 10× eyepiece gives 400× total magnification — enough to see individual cells in a water droplet.
The telescope works on the same principle but faces the opposite challenge: the object is not close and small, but impossibly distant. A convex lens (or concave mirror, in reflecting telescopes) gathers parallel rays from a star and brings them to a focus at the focal plane. The eyepiece then magnifies this image. The Hubble Space Telescope’s 2.4-meter primary mirror is, at its core, a convex lens geometry: a curved surface that collects parallel light and bends it to a single point.
What the Interactive Graph Reveals
The relationship between object distance and image properties is not linear — it is a hyperbola. As u approaches f from above, image distance v climbs toward infinity. The lens is doing more and more work, bending rays at steeper and steeper angles to bring them together. At u = f exactly, the image distance is infinite — parallel rays never converge.
This is the asymptote that every optical designer must manage. Push an object too close — inside the focal length — and the lens suddenly cannot form a real image at all. The rays diverge. Your eye traces them backward and sees a magnified virtual image floating behind the glass.
Move the object just slightly farther and the entire character of the image changes. The transition is abrupt, not gradual. A lens at u = 1.01f produces an enormous real image meters away. At u = 0.99f, that image disappears entirely and is replaced by an upright virtual one inches from your eye. The same lens, a millimeter of movement, two completely different physics regimes.
The Camera’s Eye
Every digital camera is a convex lens in a mechanical dance with a sensor. The lens forms a real, inverted, reduced image on the sensor — exactly what the lens formula predicts for u > 2f with a small sensor at the image plane.
Autofocus systems work by solving the lens formula in reverse: a distance sensor measures u to the scene, and the lens moves to adjust its distance from the sensor until 1/f = 1/u + 1/v holds with v equal to the fixed sensor-lens separation.
Modern smartphone cameras use multiple convex lenses of different focal lengths (wide, ultrawide, telephoto) to approximate the zoom range that a single lens with variable focal length would give — the same reason your eye has a lens that can change its focal length through muscle accommodation, allowing you to focus on both near and far objects without moving your head.
Why the Lens Must Be Curved
Light bends when it passes from one medium into another at an angle — this is refraction. A flat glass surface refracts light but does not focus it to a point. Only a curved surface can take parallel rays striking different points on the lens and bend each by a different amount proportional to its distance from the optical axis, so that all rays converge to a single point.
The spherical surfaces used in most practical lenses are an approximation to the ideal parabolic shape that would bring all rays to perfect focus. The compromise is spherical aberration: rays far from the optical axis focus slightly closer to the lens than rays near the center, producing a fuzzy halo around bright points. Better lenses use aspherical surfaces or multiple elements to cancel this error.
But even with all its imperfections, a single convex lens can take light from a star a trillion kilometers away, focus it to a point smaller than a human hair, and hand that image to your retina — and do it all instantaneously, at the speed of light.
The physics is not complicated. The consequences are everything.